Making the right choice of website basis is really an important thing. Conversion directly depends on the interest level of the visitor, the attractiveness of the offer, and the ease of the process. As you can see, two out of three factors are about your CMS and the skill of using it. If you decided to move from TYPO3 to WordPress, you are at the right address! Follow this step-by-step instruction, and breathe the new life into your website. Let’s start!
- Create an account or Sign In via Facebook or Google.
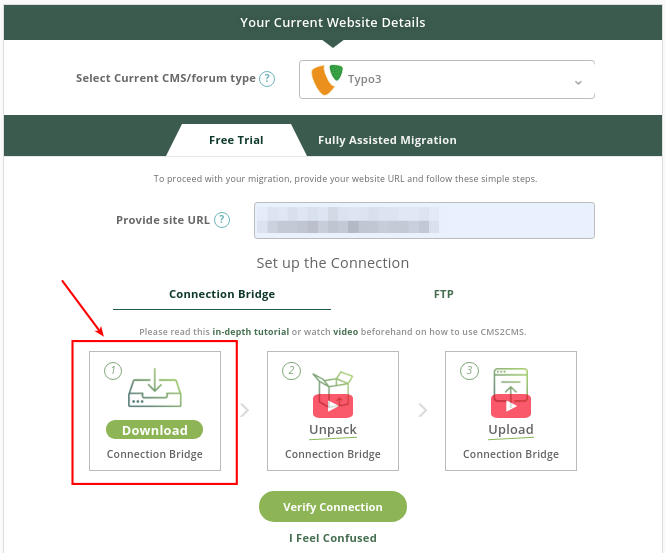
- Select your current CMS platform – TYPO3. After that, provide your website URL address.

- Press ‘Download Connection Bridge’
Connection bridge file is a special gateway used to gain access to the data from your Source website.
- Go to the place where you have downloaded the ZIP file and Extract the ‘aisite’ folder to your computer.
-
Install FTP
After that, you need to install FTP (The File Transfer Protocol), like FileZilla. It is necessary for connection your existing and new websites.
To connect to your website via FTP client software, you need to provide the FTP hostname, username, and password. You can find it out from your hosting provider. In general, most of FTP servers use port 21, SFTP servers use port 22 by default.

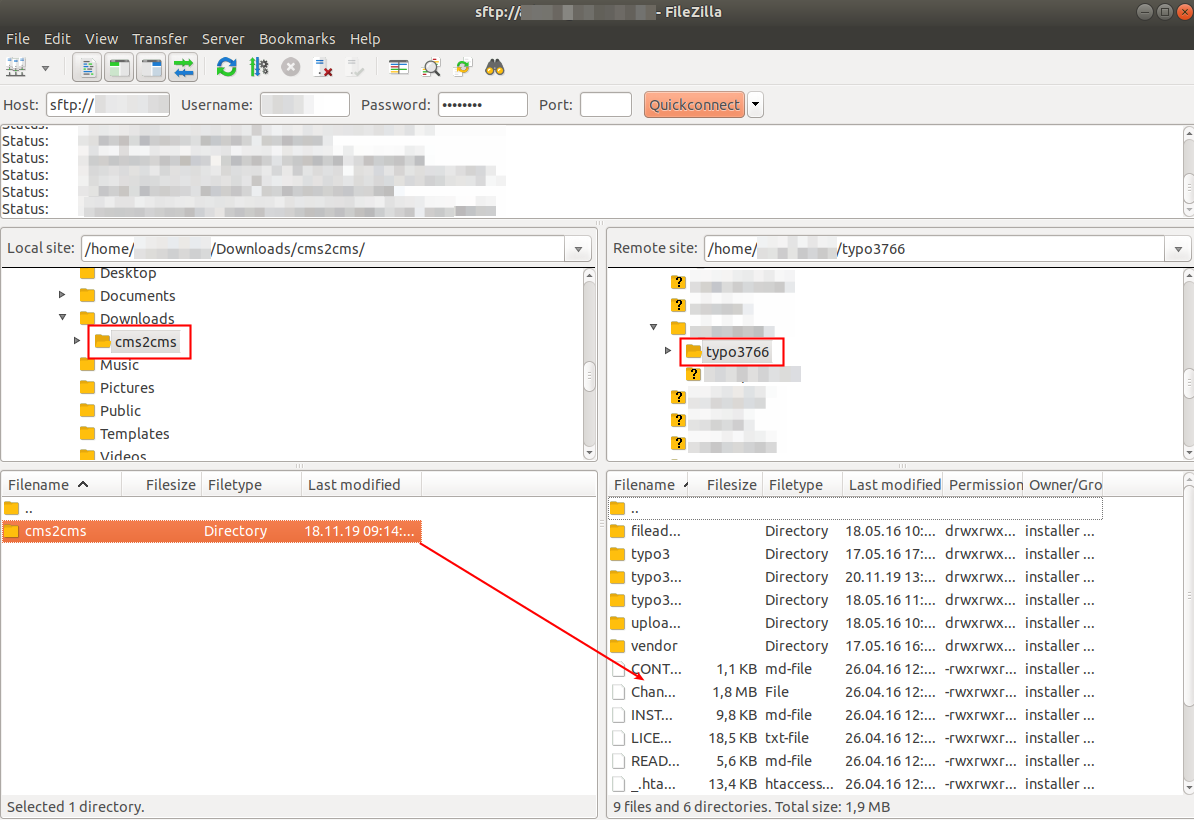
- After a successful connection open ‘Downloads’ -> ‘aisite’ folder at the ‘Local site’ section
- Choose the root folder of your existing website at the ‘Remote site’ sector
- Copy ‘aisite’ folder into the root folder, like it’s showed on the screen below

- Awesome! Now you can go back to the migration page, and press ‘Verify Connection’
Check whether the Connection Bridge file has been installed correctly.
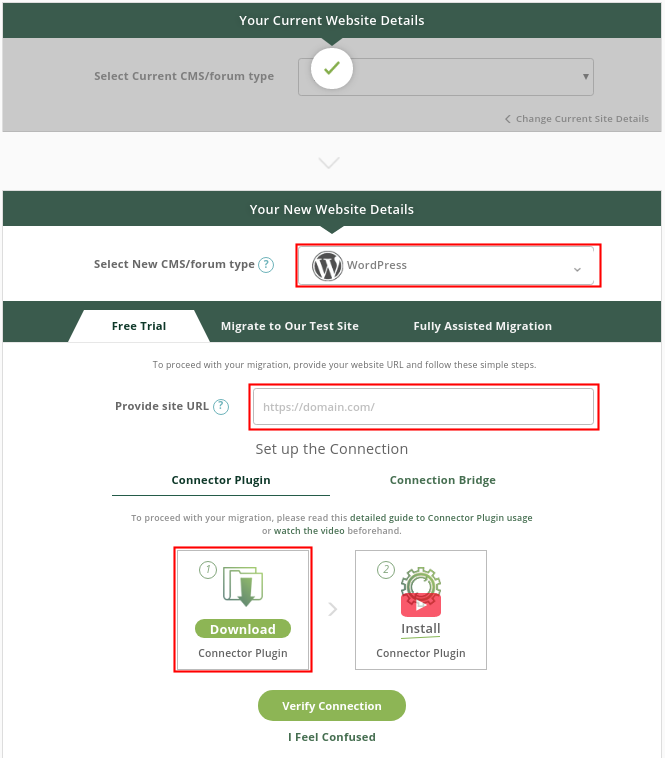
- After that, select your New Website CMS and Provide a URL address
There is a possibility to set the migration manually like it is shown below, or automatically like it is in the video! Or you can try a Migration to Our Test Site, in case you don’t have a new website yet.
- Please, Download Connector Plugin to connect your WordPress site

- Proceed Installation
Go to the WordPress admin panel. Here, on the plugins page, press ‘Add New’ and upload the file you have downloaded previously. Press ‘Install Now’
-
Activation
After installing, you have to ‘Activate’ aisite Connector plugin

- Click ‘aisite Connector’
You are almost there! Now you need to click ‘aisite Connector’ like it is showed on the screen below

- Sign in here again into your aisite account, and press ‘Proceed’. This action will bring you back to the aisite website

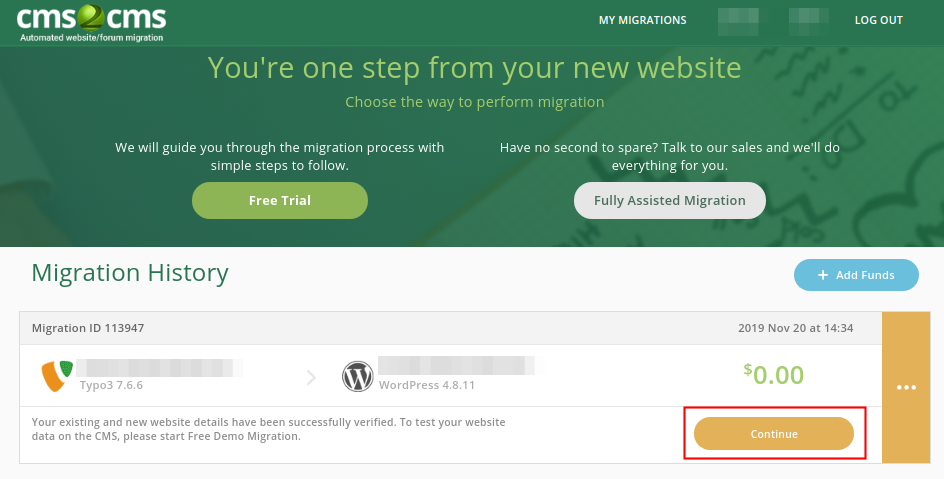
- You are almost there! Now press ‘ Continue’

- At this step, you are able to choose Entities and Additional options. After that, finally, press ‘Start Free Demo Migration’
- Done! Now you can check out the results!
During demo migration, you can see part of your data. Here are two tables: in the first one, you can see the number of imported content. On the second – highlighted in blue – are clickable links. Here you can compare the previous appearance of your website and the new one.

- If you are going to move from TYPO3 to WordPress – don’t waste your time, start your complete migration!
We hope this article was helpful to you. You can press here to Start Your Migration!
By the way, there is a possibility to choose Fully Assisted Migration – our team would be happy to do everything instead of you!
Have a good day and a high conversion rate!


