Joomla is considered to be one of the CMS giants that allows to create intuitive, featured-rich, and highly advanced website, whether it’s a blog, complex web page, or intranet. Opening the horizons of creating the professional as well as flexible websites at the same time, nowadays Joomla is rapidly widening its market share and getting lots of newcomers. Moreover, today more and more people are ready to take courage in both hands and convert their sites to Joomla.
With aisite automated migration service, you may perform your Joomla migration swiftly and flawlessly without meeting a difficulty halfway. It takes little time, includes all the site data conversion, there’s no website downtime, and aisite is suitable whether you are a web expert or entry-level user.
So, to make your website conversion inconspicuous and accomplished, we have prepared a few peculiar hints and tricks for your Joomla migration.
Joomla Migration Guide: Specification
1. Joomla Installation
Of course, if you have planned your website migration, first of all you install your new Joomla CMS. It’s not recommended to customize your new website before the migration at once. This may cause some conflicts during the migration of your modules or extensions content.
2. Extensions Installation
As far as aisite supports the migration of ?ertain modules (extensions) data, you may easily install the following Joomla extensions to migrate your current data directly to the right place:
- JComments – You should know that Joomla doesn’t have a default tool for your comments. Thus, it’s recommended to install this extension in order to migrate to Joomla all your comments , where they should be.
- Phoca Image Gallery – in case you have an image gallery on your current website, you may migrate it directly to Phoca Image Gallery, so it’s wise to have this extension already installed.
- Joomla Kunena – it’s a forum extension. In case you have the one on your target site (you want to migrate from) and wish to convert it to Joomla Kunena, just check whether aisite has your current forum platform in the supported list, and if so, – set up Kunena to migrate your forum data directly to its place.
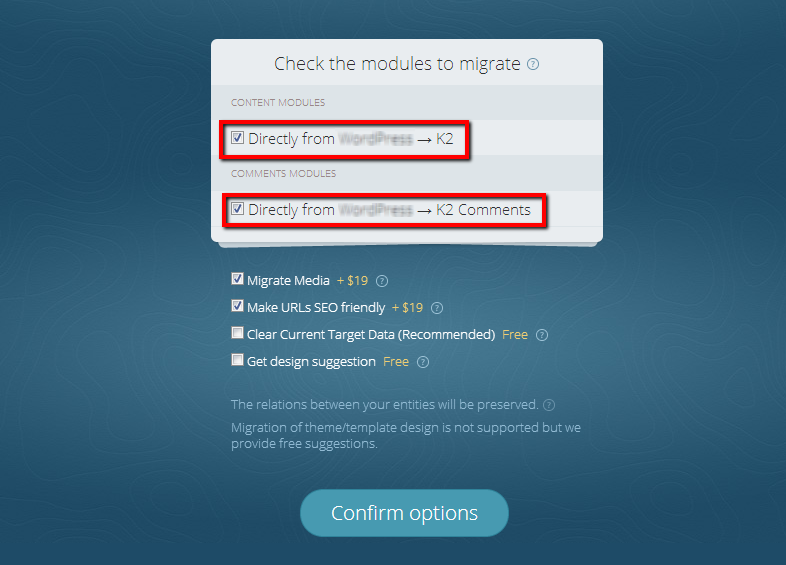
- Joomla K2 – Also, aisite allows to migrate your website items to Joomla with K2 extension. If you have K2 installed, then all your data will be moved directly to Joomla K2.

3. Linking System Organization
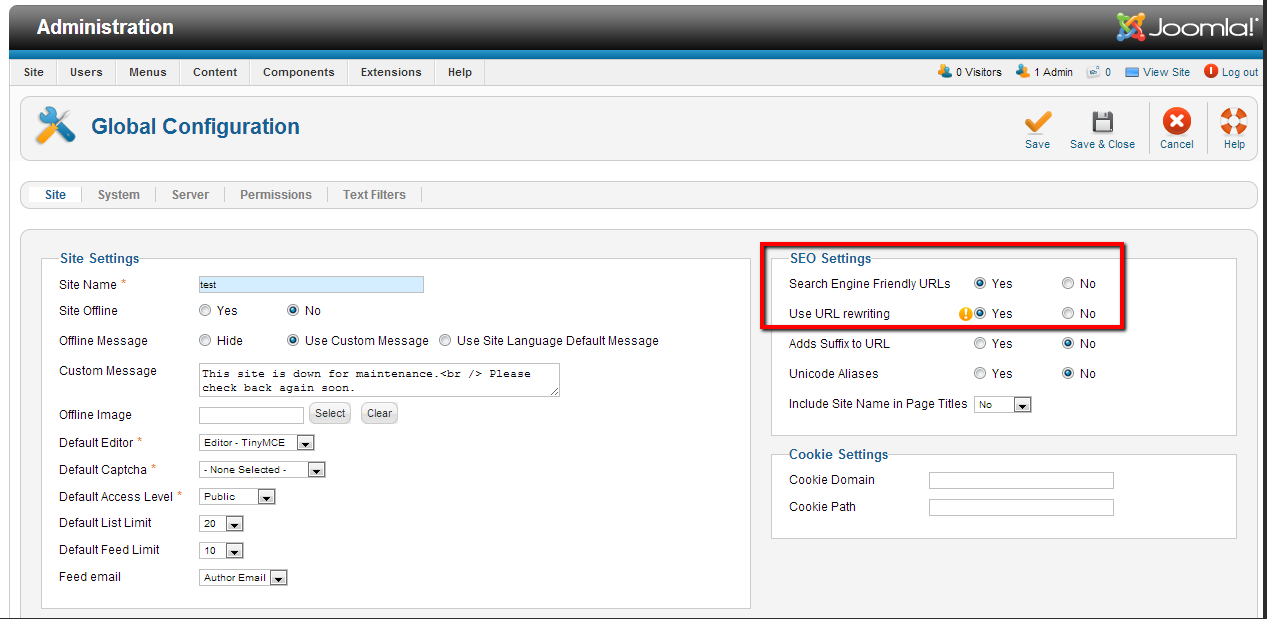
In order to migrate your website aliases properly (means, to preserve the SEO look of your links), go to your Joomla Global Configuration ->SEO Settings, check “Search Engine Friendly URls” and “Use URLs rewriting”
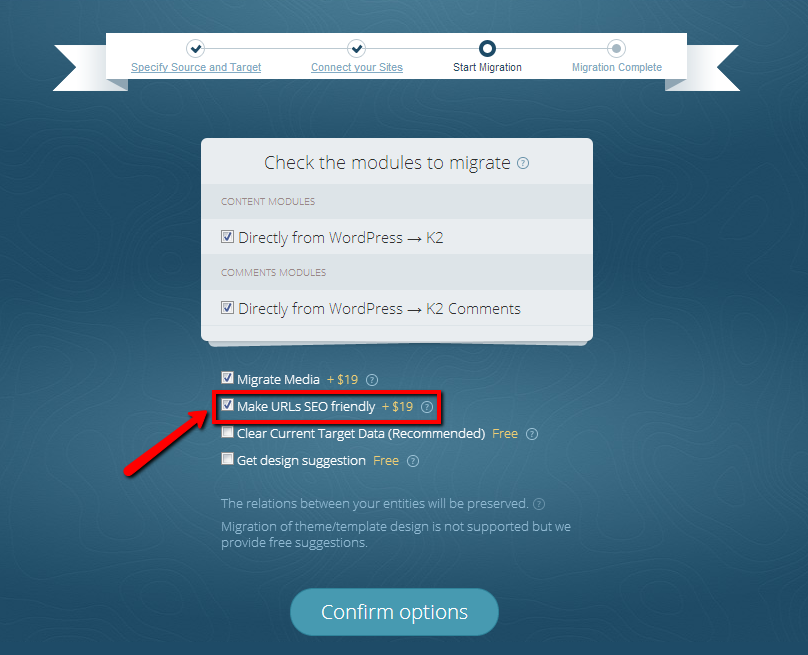
And then, during the migration, you’ll just check “Make URLs SEO Friendly” in the migration wizard.
4. Test Your Joomla Freely
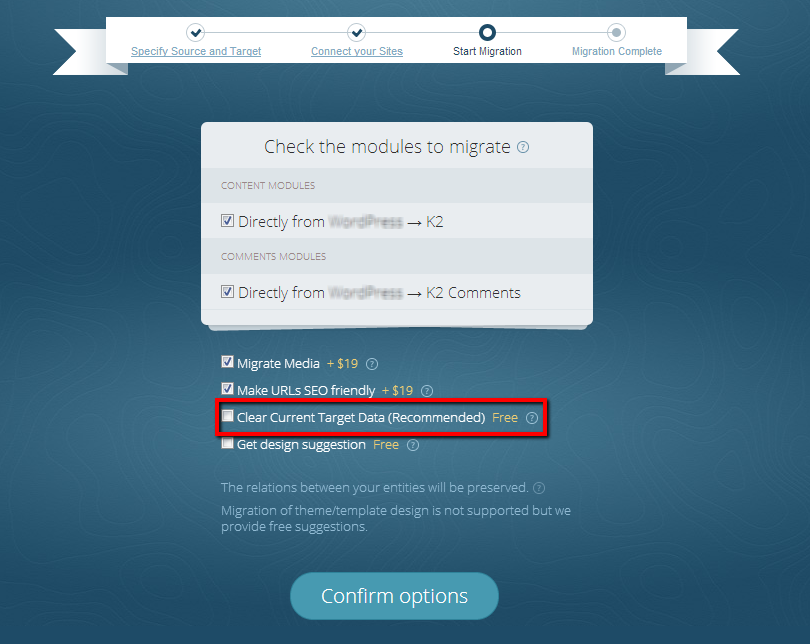
Also, you add some test data to your new Joomla website in order to see for instance how the posts and pages will look like, etc. During the migration you may easily get rid of your test data – aisite deletes it absolutely at no cost.
5. Post-Migration Final Action
Rarely, after the migration, you may notice that your website URLs are not SEO friendly: www.example.com/?p=57459544 instead of www.example.com/your-post-title<
In this case, you should proceed with the following steps:
- Connect to your Joomla website data via FTP (you may use any time of them. You can find out your FTP access details from your hosting provider).
- In Joomla root directory find “htaccess.txt” file.
- Rename “htaccess.txt” to “.htaccess.txt” (notice, with a dot)
- Then, login to your Joomla back end and go to “Global Configuration”
- Check “Enable SEF URLs” and “Use Apache mod_rewrite”
- Save the configuration.
Automated Joomla Migration Process Live
So, following these simple steps, you’ll be able to migrate all your website content to Joomla easily and flawlessly. Now, it’s time to start your free Demo Migration to make sure that the automated Joomla migration is the ultimate way of data conversion.


