Your website may be your online “home”, your carefully thought through project, the basis of your business or simply a hobby. Whatever it is, it is not an easy decision to move it to the new CMS platform. You must have really solid reasons compelling to make this step, the most frequent ones being lack of functionality, poor design improvement capabilities, expensive maintenance etc. Well, even if CMS migration is just a whim because you simply want fresh look, feel and experience, it still has to be carried out after proper preparation and using the right tools.
One of them, which is used quite often by website owners is aisite. It is created to make the seemingly complex and time consuming process of website migration to a new CMS simple and quick. Nevertheless, many users are worried about their websites data and design after migration, and it is only natural that they want to make sure everything is going to be fast, easy and secure. So, let us tell you in details about each step of migrating with aisite and what to expect from it to help you get rid of the apprehension about the whole thing.
To start with
Let’s clear up what is meant under CMS migration. It means moving website content to a new content management system. So, pay attention to the following points:
- it is website content (pages, posts, users, comments, images etc) that is actually migrated, not the whole website.
- Website design (theme, template, layout) is not migrated. Therefore, there’s no reason to expect that your site will look exactly like it used to on its former platform once the migration is over.
It is essential that you understand this before the migration. The point is, due to severe differences in the way various CMS platforms are built, it is next to impossible to migrate design. If you want your new website to be similar to the previous one, its appearance will need to be recreated by building a new theme or adjusting the existing one.
With this in mind, let’s walk through the key stages of CMS migration with aisite.
1. You pick your Existing and desired CMS platform. Before the move, make sure that the new CMS should be installed.
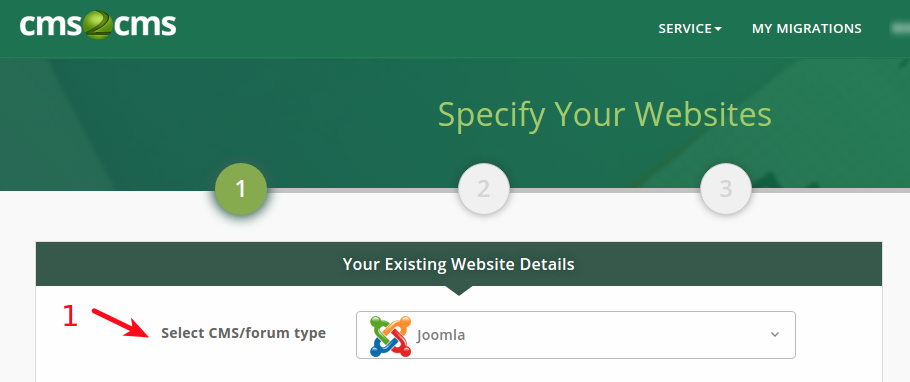
2. Provide your existing website’s URL (as in the example below). aisite establishes the connection between your Existing and New websites via a “connection bridge” file. It requires a little help from you though, so the first thing you need is to download the file from our Migration Wizard.
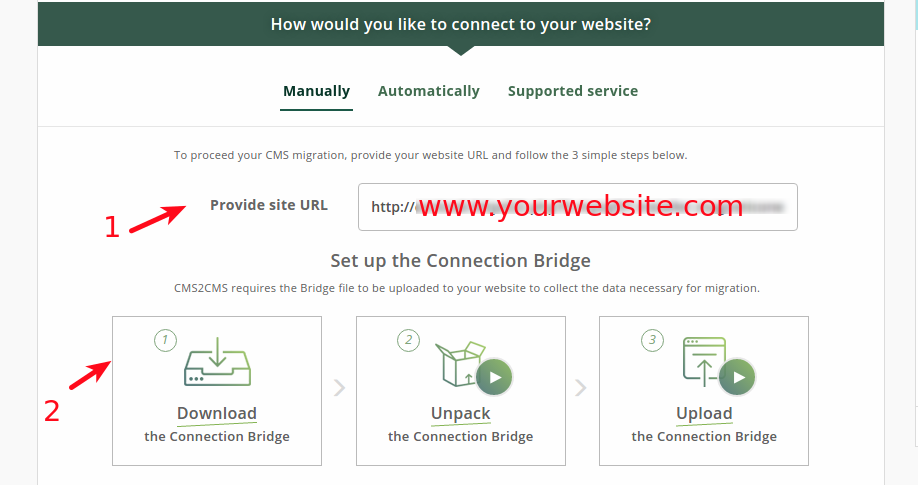
2.1. Unpack the downloaded ‘aisite’ zip file and upload the extracted ‘aisite’ folder from the zip file to the root folder of your existing website. This is done via any FTP client software, like FileZilla, after you’ve provided your host, username, password, and port (there you usually enter ’22’ or ’21’). Follow the instruction on the screen below. First, you enter your FTP credentials, then, you copy and paste ‘aisite’ folder to the root folder of your Existing website.
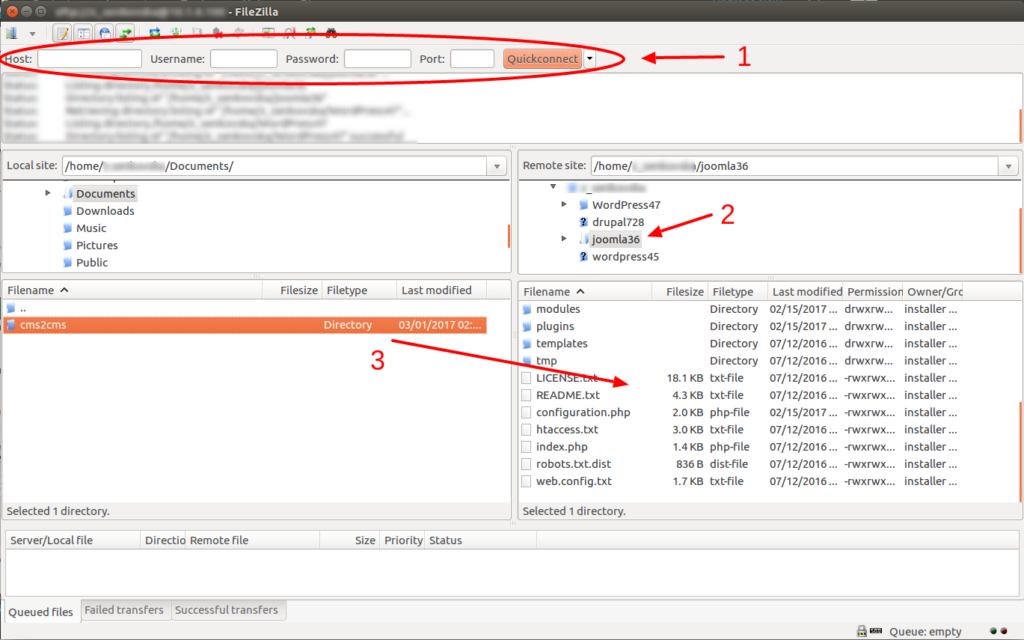
Repeat the same procedure to connect your new website:
- Enter its URL address;
- Download the connection bridge and unpack the ‘aisite’ folder;
- Upload it to the root folder of your New website.
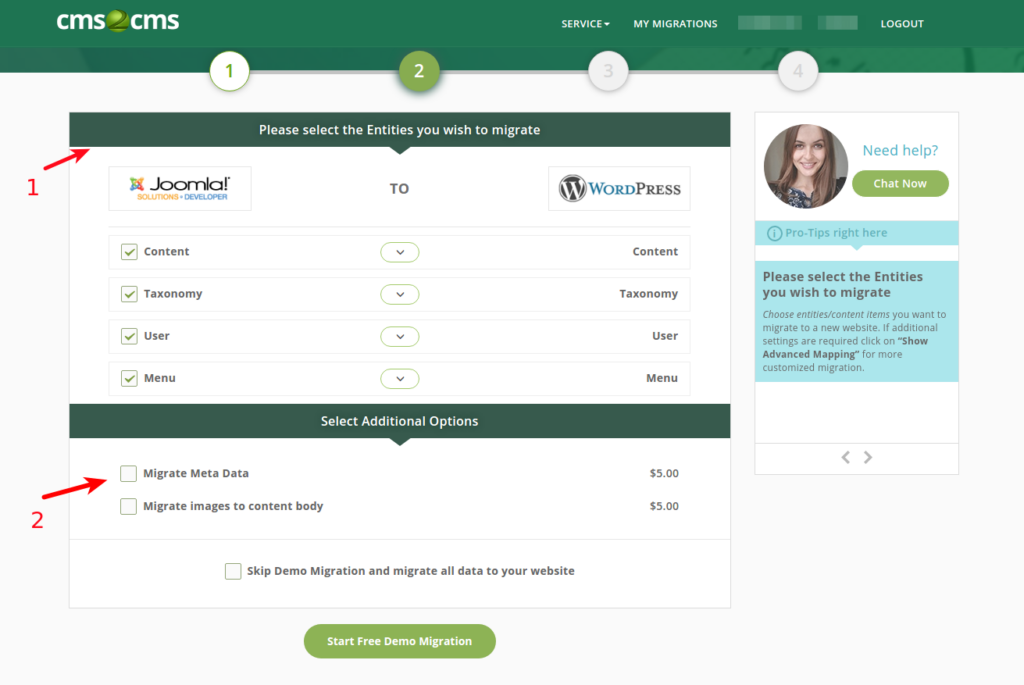
3. The previous step enables data interaction between your websites, and once they are connected, you can proceed with mapping the entities (for instance, specify that posts are to migrate as articles etc) for the service to “know” how exactly you want different parts of your content moved.
Note: Here is a short video to help you clarify more what does all this ‘Connection-bridge thing’ mean.
4. You are all set to run the free and fast demo migration. We recommend that you do, as it will move up to 10 entities of your choice to the new platform, and you’ll see clearly how everything works.

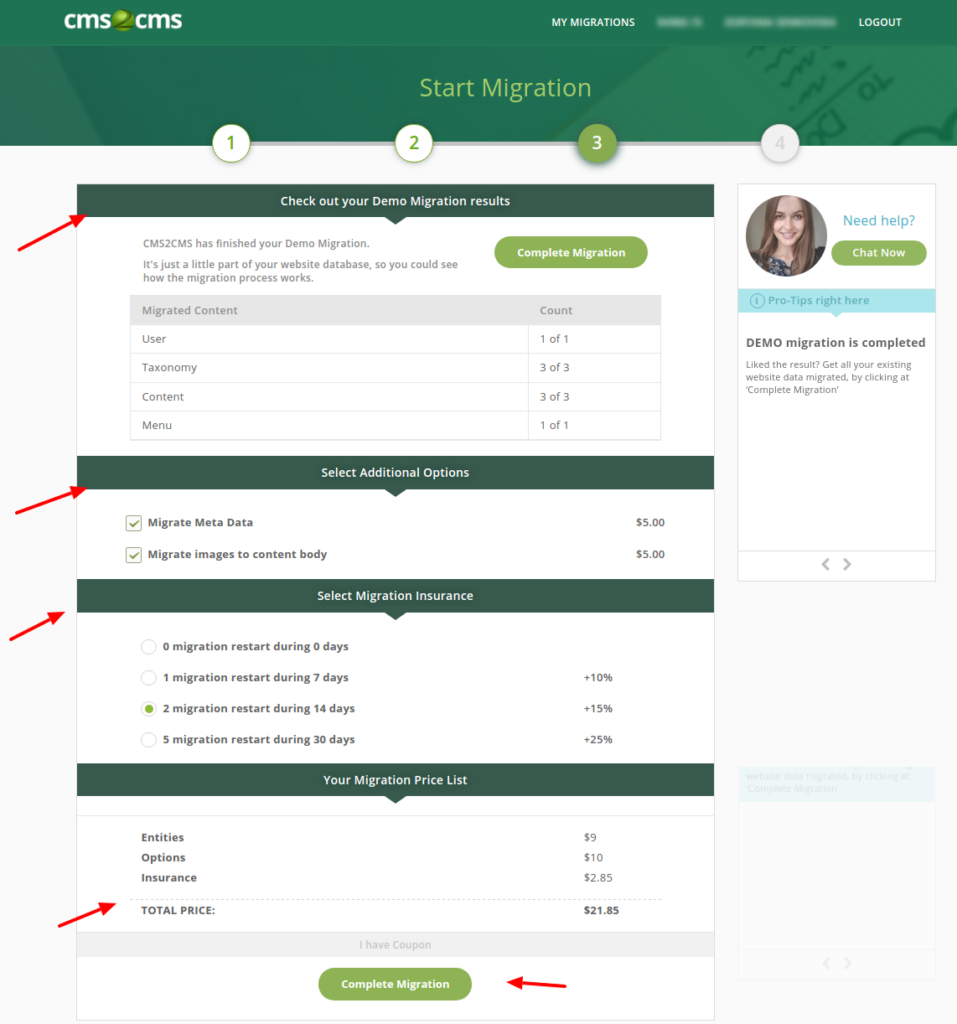
5. If you’re satisfied with the outcome, you’re one step away from having all of your website data migrated. After Demo migration is finished, you can browse its results, select additional options and insurance (optional), check how much will the Complete data transfer cost you and get it going. The Complete migration will definitely take more time than Demo did, and the duration depends on the volume of data to be handled. Once the process is set, you can close the browser window and relax, while aisite does all the heavy lifting. You’ll receive an email notification when your migration is completed.
As you can see, there are just 5 simple steps to having your old website on the new CMS platforms. However, content migration, which aisite is happy to help you with, is just one aspect of the whole business. Don’t forget about the design part and pay attention to the following remarks:
- aisite is an automated tool, so it doesn’t deal with any content appearance issues at the website frontend.
- If website content looks wrong at the frontend, or doesn’t show at all, but is found in the backend, in most cases it is a theme/template issue that aisite cannot handle. It can be fixed using the right configuration settings.
- It is highly recommended not to configure the destination website theme/ template prior to migration. It may lead to issues with content presentation, and is best done after the content has been moved.
Wrapping up
Well, now that you know what to expect from your CMS migration and how it goes, you’re doomed to success. So, put the long-awaited move on your schedule and get ready for the new exciting opportunities and positive changes in the life of your website.


